Sourdough boule

I have gone through quite a few recipes. Some were great and some not so great. After a lot of baking and practicing I decided to try to make my own recipe. And guess what… it worked! It is now it is ingrained in my brain, and I will never use another recipe ever again.
Tools
Scale
Dough whisk
Dough scraper
Banneton
Duster for flour
Shower caps or plastic wrap
Scoring lame
Dutch oven
Parchment paper
Ingredients
150 grams sourdough starter
1 tsp sea salt
350 grams warm water
500 grams bread flour
Directions
I added the time of the day that I use, however, this will depend on your kitchen, its temperature, and the strength of your starter. So, if you are basing this bake strictly on my time frames your dough may not come out as you want. This is something you will need to practice by watching the dough change in form!
7:00pm (the day before): If you are using fridge starter feed and set aside for 8 - 12 hours before your start.
7:00am: Grab your scale, a large bowl, a shower cap or plastic wrap, dough whisk, dough scraper, and ingredients.
Place your bowl on the scale and level to 0.
Put your 150 grams of sourdough starter, 1 tsp sea salt, 350 grams warm water, and 500 grams bread flour together and mix until combined with your dough whisk.
Place the shower cap over the bowl and set in a warm place to rest.
8:00am: Once the dough has rested for an hour do your first set of pulls. Set aside to rest.
See pictures below on how to do pulls. You will want to do as many pulls as you can before the dough gives you no more room to work. It will feel less sticky and come together into a nice ball.
9:00am: Do another set of pulls and set aside to rest for 8 hours or until the dough as doubled in size.
5:00pm: If your dough has doubled in size by this time you will want to grab your banneton and flour.
Dust your banneton in flour.
On a clean surface (I use my countertop) wet your hands and with your dough scraper remove the dough and place on the counter.
Do your final set of pulls and then place the dough seam side up in the banneton. Place the shower cap over the banneton and place in the fridge for the cold proof.
8:00pm: Preheat the oven to 450º F with the dutch oven in there. The dutch oven needs to be hot for the bake.
When the oven is ready for your loaf set out a piece of parchment paper and remove your loaf from the banneton onto it. Dust lightly with flour and score to your desired design.
Remove the dutch oven from the oven and put the loaf in. Cover with the lid and place in the oven. Bake for 50 minutes.
After 50 minutes remove the dutch oven lid and bake for another 5 minutes or until nice and golden brown.
After the 5 minutes remove from the oven and place onto a cooling rack. To make sure it is done you can to the tap test. Tap the loaf and see if it sounds hallow. If so, we are done!
Do not cut into the loaf until it is fully cooled.
Notes
If you are not in the PNW and at a higher or lower elevation you may need to find the perfect balance or recipe for your location as this can play a huge role into your bread making.
Additionally, the weather plays a huge role. The summer months your dough could rise way faster than in the winter where it can rise for a long time so do not stick to the timings as the only way to make this. You will have to play with it and watch your dough rise. Some days I have a rise that only takes a few hours because that say my starter was just that hungry!
Sourdough making is an art. It’s a conversation between you and the dough so listen and learn!
If you don’t want the bottom of your loaf to get too dark, put a piece of foil at the bottom rack of the oven. Even bake every time!


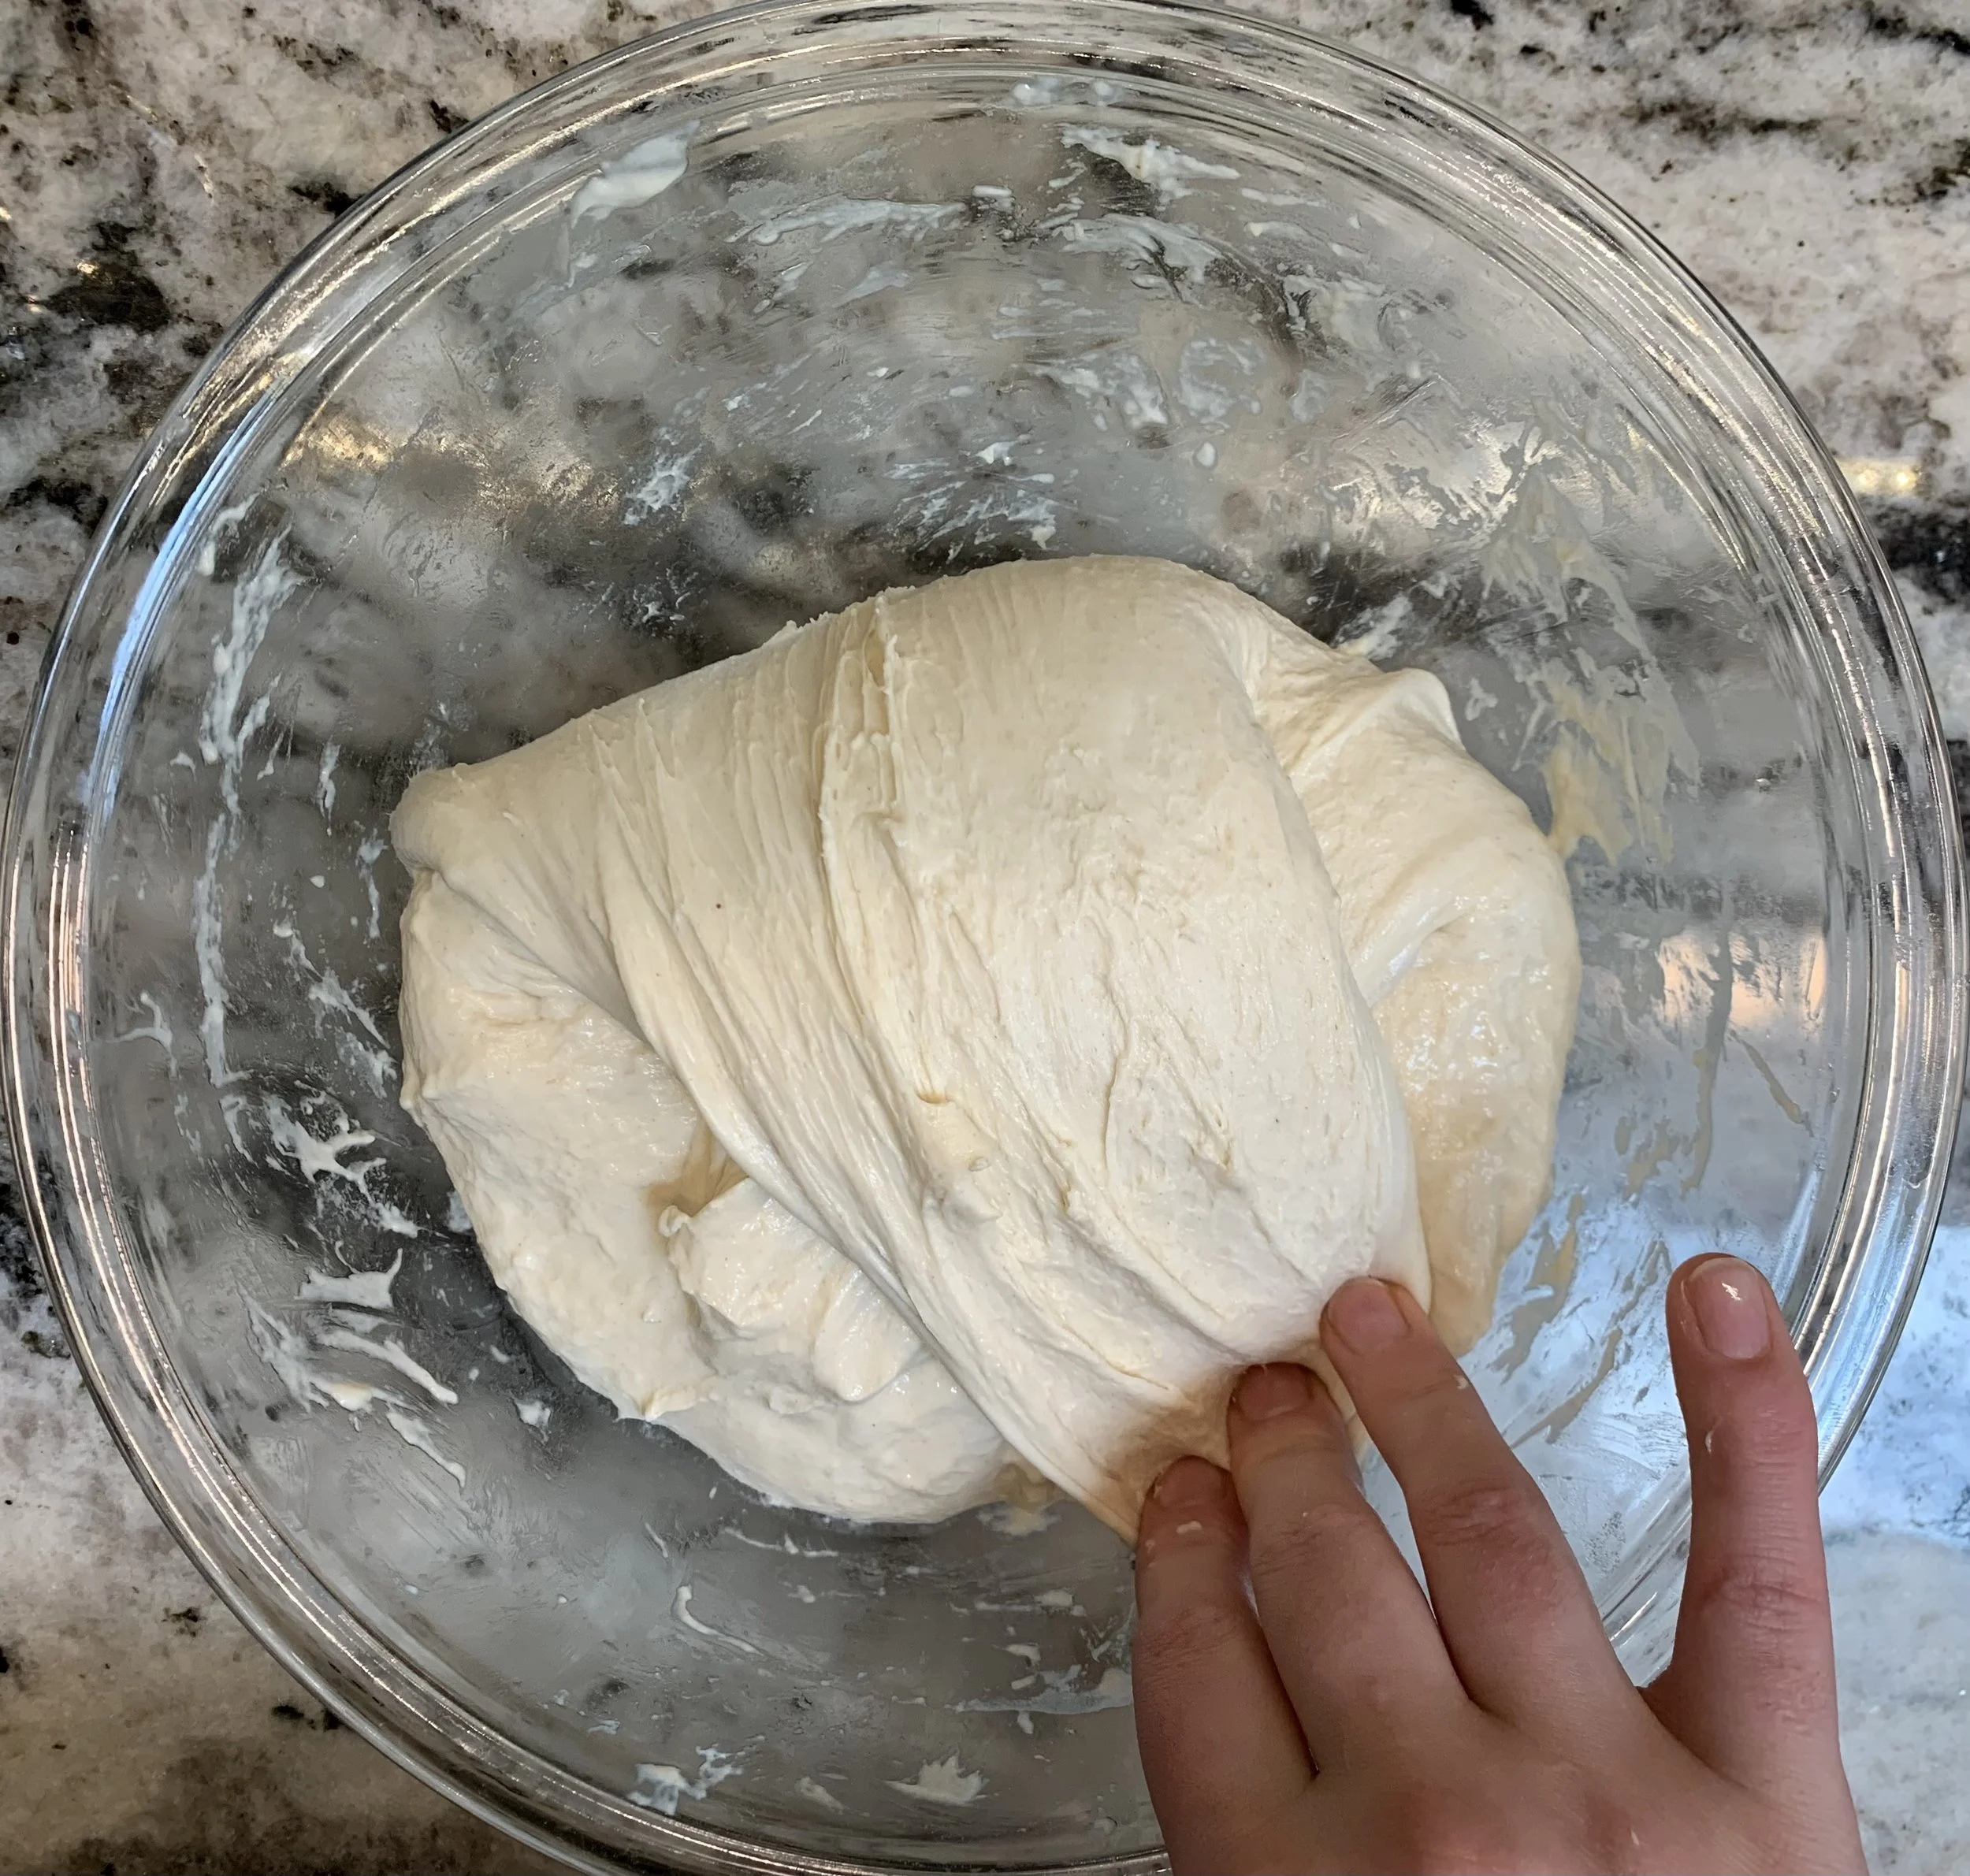


Keep doing your pulls and folds until it comes together in a tight ball, like below. This could be anywhere from 10 - 20 pulls!

